Sunday, 3 November 2019

Week 5 summary

It's Sunday, 3rd of November 2019, day after Blizzcon!

I've got a lot of plans for today that include finishing up the high poly model completely and moving on to retopo but also hair card experiments. I'll get into my reasoning for using hair cards and other key decision after this week's work recap.


Few days ago I documented the progress on my character's helmet, I'm certain I've finished it so here's the entire process:


Main inspiration for my helmet was an air force fighter helmet model HGU-55. I did not stick to the concept completely by making the strap go fully around the helmet, making my own buckles, different straps, cables and the oxygen mask. HGU-55 is a lightweight designed for the high-g combat environment. What I wanted to achieve with changes I made was make it a bit more modern looking but not to the point where it's sci fi as concept I'm referring to is fairly realistic.

Helmet ref:


I decided not to use the helmet from the initial concept as to me personally it doesn't make much sense and looks too sci/fi, almost storm troopery. It also clashed with the soft looking female character and even though I'll be making some changes to the facial features too, I wanted to keep the same feel of the character. That's why I chose HGU-55 as my helmet as it's very lightweight and sleek, fitting a feminine character more, without looking abstract or unpractical.

From the feedback I've gathered it was a good decision but a lot will still depend on how I texture this.
Overall I'm very happy with the helmet, I was very intimidated by hard surface modelling, especially that I wanted to do it in zbrush to preserve the same semi-realistic sculpted look throughout the whole character.

One thing I would do better next time is instead of masking in some of the elements and extruding them from the mesh, I'd build them around the helmet in 3ds max. I only realised that this was more comfortable and efficient when making clasps around helmet and the oxygen tube, also taught me a new use of spline tool which I'll document later in this blog post.


Making hard surface elements

One of the techniques I used for the small elements of the helmet was box-modelling in 3ds max.
I used 3ds max and not zbrush to achieve the artificial, man made look faster and to avoid the "putty" shapeless mesh stage. Not only it would be so difficult to polish such piece of geometry until it looks symmetric and metal-like, it would take much more time so I started with this blockout instead.


 Step 1: Put in edge loops around the box shape, their placement should correspond to the strongest shapes from the reference


Step 2: In symmetry mode, scale the proportions to achieve the right proportions and move vertices around to get the right shapes


Step 3: Exaggerate shapes, check progress on each side of the model, clean up topology


Step 4: Import into Zbrush, position right


 Step 5: Subdivide the model, make sure it doesn't overlap any other mesh, in this case the helmet rim. I also added some touches of the high polish brush, so that it'll look worn out but not too much because it's such a small asset it won't be very visible in the end. Lastly, due to using subdivide, some of the hard edges and crevices were softened so I used a geometric brush that makes very sharp "cracks" in the mesh on a low opacity to deepen them again and I really like the final result.


I repeated the process for each of the small elements. Some needed more work in Zbrush, some less, but overall I'm very happy with the look of my helmet now. It took me less than a day to block in all the new elements, in comparison, when I made the initial strap that goes around the helmet I struggled a lot to get it right.


To learn more about proper hard surface modelling, I also did my cylindrical tube assets, like the oxygen tube, microphone or the cables tied together outside of zbrush. I also used 3ds max and made these components using splines as you can see below:


Step 1: Make a smooth spline ,I estimated shape & size which was a mistake, process would be easier and faster if I did it on top of imported torso.


Step 2: I made a side profile of my oxygen mask pipe. I referred to the original HGU-55 design . I believe if I did it with a smooth tube and only painted the detail on it'd be too flat. Especially for an asset that's crucial in this project.


Step 3: I've extruded my side profile and added vertical loops to make a smooth spiral. Before next step I've skewed my object by a few degrees horizontally to prevent strange deformations.


 Step 4: With bend modifier I was able to create a tight spiral out of my object.


Step 5: As you can tell it was not great so I've adjusted the skew modifier just enough for the edges to barely touch.


Step 6: I was able to easily weld all my edges and to make it a bit cleaner I did make sure that the vertical edges are lined up.


Step 7: Just for the sake of testing I applied a simple checker diffuse map and adjusted tiling until it looked as desired.

 Step 8: As it's not a good practice to stretch materials like this, I used the UVW Xform modifier instead to tile the checker pattern.

Step 9: I always had the issue of scaling in 3ds max when applying more complex modifiers but learnt how to overcome thi by reseting the local scale.


Step 10: I checked the length of my spline and made an object corresponding to it. Then I have cloned my spiral multiple times so it's just as long.


Step 11: To use the path deform modifier I had to attach all the pieces together.


All that was left was use the modifier, choose the correct axis and make sure there's no deformations :)


Final outcome. I'm pretty happy with this, I bent some of the areas to visually add more weight and tension to the oxygen tube. This made it look as if it actually touches the character as opposed to floating without being affected by the rest of the assets.

I used the same workflow for my other tube shaped elements and I'm glad I learnt this as it's a very quick and easy way to add some shape diversity and small detail.


Below you can see my combat books workflow, I also tried to make them using the box modelling technique as that's what I usually use, but it was not turning out the way I liked it. I had no control over individual pieces and it was difficult to get the shape definition right.


And here's the reference I mainly based off my boot design off:


To match the design of the helmet and the overall feel of the character I did break up the shapes of the toe cap to make it look a little bit more futuristic. However, I didn't go too much into detail & textures as texture will define it the most.


I have also made my character's belt this week, I stuck to the original concept as I thought it didn't need any adjustments and fit together with other hard surface objects.


I ended this week with a blockout of the character's vest. I pretty much left it as is but I'm still playing around with the proportions so it might change a little bit. However, I don't have much time remaining for this project (started out 1 week behind) so I'll probably ask for final feedback & advice on my high poly in class and move on with this piece.


What would my summary be without a one final shot? I'm very happy with the direction my piece is taking, decisions I took and things I changed along the way were worth it. Speaking of changes, I need to re-think the way I'll be doing my characters hair, while attempting using hair cards I realised it'll be very difficult to do considering there's a helmet and thick padded clothing. My plan for now is to make a sculpted blockout and blend in some hair cards on top of that.


See you in week 6! Formative deadline date for this is 15th of November so I'll do my best to clean this model up and bake it. Ideally I'll be done with my textures by Sunday, but that's unlikely. I would like to have at least 5 days for rigging and a simple marmoset presentation set up. Also, we need a plinth for this babe!

Saturday, 2 November 2019

Week 5 Self Portrait


R e s t .

Had to take a break from all these polygons for a day and what's the best way to take a break from art than making more art?


Some outtakes from this painting:
I think it helped me greatly to prepare for sculpting and texturing face of my character ( I want to include view with the helmet off, character holding it). I learnt a lot on 3d forms and portraying them in 2D to achieve realism & likeness.
My goal was to have every stroke have its purpose but also to keep brush strokes to my advantage by keeping them larger and looser around the area of focus where for contrast I used smaller strokes.
I think I have achieved this but I'd like to improve my material rendering next time as areas like skin, hair and cloth could use more definition.
Another thing is I wanted to play with lighting to accentuate certain areas like the puffy cheeks which are a crucial feature for achieving my likeness! Didn't think of using light to my advantage like this and it will definitely benefit me when working on presentation of my model.

Overall I'm happy with the results and feel prepared to tackle character sculpt which is especially important as I received feedback saying its face is too generic. (Understandable as model is still not very defined in face area).


When deciding on colour palette, rendering style and the level of detail I used AI to produce a series of face iterations. It was helpful as it was very quick and saved me a lot of time by doing the trial and error for me ^^ I'll definitely use this method in the future again and research more into ways of incorporating AI into 3d workflow, just to make it more about the actual artistry.

Week 5 Blizzcon notes

A lot has happened this week, I got my formative feedback, I did a huge progress on the character in just a few days, learnt a bunch of technical stuff I can't wait to use in my project & document on my blog and it just happens to be Blizzcon time this weekend. I bought myself a virtual ticket to have access to the art panels taking place on saturday and will be taking notes of the given advice to see what I could do better! Stylised games made by studios like Riot and Blizzard were always a huge inspiration to me so I believe it'll be time well spent :)


First panel focuses on Diablo IV art. Personally I really like the new Diablo for its blend of realistic and stylised features (also called 'the Blizzard touch'). I'd like to apply these principles especially to my creature project, but also a tiny bit to my character as it's not fully realistic or stylised judging from the concept I'm working from.

Here are some of my outakes:

- When sculpting, start adding wear and tear from the edges.
The way artist worked in Zbrush seemed like he started from the edges to establish the final feel of the subtool he was working on at the time. What I liked about this workflow was how easy it was to tell materials apart with just its surface. For example, all leather assets had uniform polished edge that looked like worn out leather which sold it for me.

-Tell a story with sculpt details.
Artist showed a goblin that has went through some things and added scars that looked as if he was whipped in the past. I'll keep this advice in mind when adding "character" to my helmet character and my creature.

- Even if game is fairly realistic (New Diablo) there has to be the "Blizzard" style touch. For me, my assets are fairly realistic and I even plan on using hair cards but I want to keep my shapes flowy and loose (e.g. on the jacket) to keep the original painterly look of the concept.

- Colour coding for Substance Painter & Designer to promote non-destructive workflow.

- Well organised UV's.
In the feedback I received I've been criticized for my UV layout so seeing how it is done in a professional setting was very informative. I noticed that tiling was used as there were UV's overlapping outside of the texturing work space which is very efficient.


- No right or wrong ideas, but seek feedback on them

- Colour palettes are established by leads & directors

- Material break up should be emphasised
After this I reflected on my previous work and noticed there could be a lot of improvement made in terms of material break up. What I mean is keeping shape language in mind and choosing

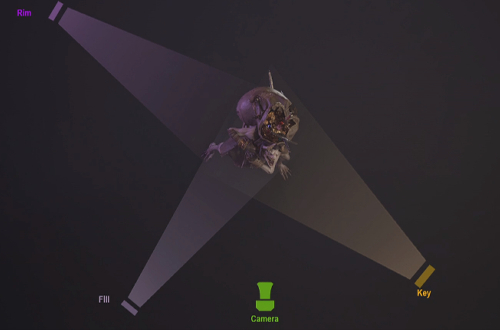
- Start lighting with 3 point lighting - Standard advice but sometimes overlooked


- Emphasize material that is mostly visible throughout the game, to find out which one is it test the blockout with in-game camera and lighting

- There's more resolution in the mesh elements mostly seen in the game in the low poly model

- Leave small details for texturing since they won't be visible in game if sculpted. Also, testing small details is not destructable if done in Substance

- When painting, use shadow to outline forms first

- Establish lighting early on

- Practice painting on primitive shapes

- Embracing legacy of Diablo 2 while introducing a fresher, sleeker look for the game

- Respect the main design - Don't overdo new design

- Tons of research - Research everything in depth, small details matter

- Preparation work - very important

- To design a new ability animation artists lock down character poses and angles (vertical vs horizontal abilities) for certain character classes

- Very loose linework as it's not going to be visible in final concept

- A lot of iteration - A lot of going back and forth, often needs clarification for 3d team


- Concept is rarely final, there's a lot of collaboration and going back and forth


- A lot of focus on shapes, lighting, values and colour

- Play of dark and light should create a nice contrast so that shapes are readible especially since game is seen from isometric view


Second panel was prepared by the Overwatch art team


- Blockout takes about a day or two, main goal is to get the model in the game asap

- Next steps include making a rough high poly sculpt, polishing it, retopo with animators in mind

- Characters use same or very similar rig

- When working on hair sculpt aim for S curves and keep silhouette in mind

- New skins should use the same rig and read very similarly

- There are 4 different LODs in Overwatch (4k 3k 2k 1k )

- Visual effects also have LOD's (Interesting fact, for underperforming machines, glowing effects are removed)

- Blizzard has its own tool team, but artists also are capable of making their own tools for software of their choice. This gave me an idea of a few scripts I could write for e.g. 3ds max or zbrush

- Baking floaters - a less destructive way of baking normal map detail - needs to be researched

- 3/4 uv maps per character

- Some artists that don't care about the technical aspects when sculpting tend to use mudbox and not zbrush


Third panel was on evolution of Overwatch Art

- Retain values of strong silhouettes in Overwatch 2

- Retain iconic bright colour palette


- Fresh look
- Kept spirit

- Inspired by story, a lot of design decisions were made by reflecting on characters back story and overall lore, this is important and helps with immersion especially since Overwatch 2 is going to be more PvE & story based

- Moving away from retro design, move towards a sleeker techy look

- More diverse environment theming in terms of colour palette, lighting and shapes

- New shaders for skin, hair, the goal was to get closer to the look characters in Overwatch cinematics have


Then there was a talk about designers of World of Warcraft worlds and overall art of the game


- Design is strong if someone can recreate it

- Think of thumbnails as something a kid should be able to draw

- Concept first > 3ds max/maya >Photoshop/3d Coat/ Substance

- Enter contests and make props specific to games u apply for

- Wide range of assets aimed at position you want

- Do not replicate, make something new that could go into the game

- Study game artbooks (Mentioned Lumis, Dynamic Hands, Roughwork)

- It was very interesting to see artists working in Blizzard's own WoW engine and new tools they have that make world creation this much easier. Almost made me want to make environments. Almost.


And even more on Hearthstone and Diablo IV


- I really really like the direction Diablo took and for the first time I see myself making assets for this game, I will definitely experiment with this soon. The main inspiration were reneissance paintings I adore so it was breathtaking to see these masterful digital art pieces


- Show passion for game you want to work for

- They can teach tech, but train eye and traditional skills

Phew, that's a lot to take in at once! But to not let this knowledge get lost I'll be going back to this post and referring to it when deciding on my creature project concept, during production and of course during my Final Major Project.

I cerainly see how much I still have to learn and am grateful for being able to receive so much pro advice ^^

Tuesday, 29 October 2019

Week 5 Tuesday update

This week I'm focusing on my character. I firstly blocked in a simple character first and dyna meshed it. I didn't spend too much time on the base model as the character from the concept I'm working on has thick clothing so doing very detailed realistic muscle definition would be a waste of time especially considering that I'm about 1 week behind.

Below you can see my moodboard/notes.


I've firstly blocked out my silhouettes after extruding them off the human figure base model. I did my best to capture the curves and body shape of the character from concept drawing. She's on the thicker side, with large breasts accentuated even more by the thick outerwear and tight fitted in the waist vest. Since I can't see the full proportions of the character in the concept I had to eyeball them and make many decisions of my own. Character's hips look quite wide so my guess is she is supposed to have an hourglass figure so that's what I went with.

Below you can see how the character's jacket has changed so far, from the extruded base to where I am now. I still need to work on it so the forms don't look "doughy" but that's a lot of progress I'm happy with.


Below you can see my notes based on the feedback I received in the Tuesday session.


And here is the adjustments I made, there's still room for improvement but my model is already looking better!


Blockout of the helmet: At the end of the day I decided to start working on the helmet and blocked it out on my model. It's rough and not finished by any means but I thought I should document its progress often since it's the focus of the project. This will be very challenging as I have pretty much 0 experience with hard surface but have always wanted to learn more on that.


More to come this week!


Sunday, 27 October 2019

Week 4 summary

Week 4 done.

I've finished my 3rd asset, the blunderbuss. I wanted to include this asset in my scene so that I have a variety of different material and surfaces. Blunderbass as opposed to the fish skeleton and a hurdy-gurdy has more structure and is mostly made of metal. It's not completely hard-surface though as it has to fit the games stylised look.


Firstly, I've done the Zbrush sculpt, mostly using polish and flattening brushes for the stylised feel.


Then I've moved on to re-topolising, unwrapping uv's and assigning colour id's for easier texturing process. I think this low-poly model turned out best so far and my bake turned out very clean.


However, it was not that good at first, I had to do a second take on the re-topology but it was worth it as I learnt a lot on cleaning up my low poly models.


Lastly, it was time to texture my model, I stuck to the given concept, matched roughness and metalness of my other assets as well as the instructions for Sea of Thieves asset materials.


Now that all my main pieces are done, it's time to arrange my Unreal Engine scene. I've made some new assets as the brief required making a simple setting. My idea as seen of concepts from week 1 was a corner of a table with cloth over it and walls in the back. To make it my scene more interesting I decided to model cloth, candles and add some posters on the walls.


This way I was able to experiment with cloth folds, fabric materials, lighting for the candles and procedural pipeline for the posters so that they don't take up much space in the scene.


Finally, I've set up my assets in the unreal scene to match my concept. I did make some changes based on the feedback I've received for my peers. I made the scene brighter and less 'spooky'. This made my scene fit the Sea of Thieves style better I think.

Unreal Engine screenshot:


Overpainted screenshot:


This is what I plan for my scene to look like when finished, as you can see I'm still missing the details for my setting and need to adjust sizing of my assets but that's not a high-importance task. Because I'm still catching up my projects I'll now move on to next project, the helmet-wearing character and finish this scene in free time on weekends.


Wednesday, 23 October 2019

Mid-Week 4

Time for an update!
As of Wednesday I've finished sculpting, retopo, uv unwrapping and texturing of 2 of my 3 props.

I've scultped the Hurdy Gurdy basing on my low poly 3ds max blockout. It was quite complex as there are many small pieces and I had to keep in mind that I need to be able to simplify it with retopo later.

I could go higher with the numbers of polygons of my retopo model, however I didn't think it was necessary due to my test normal map bakes being successful and high res. I've also adjusted my fish skeleton low poly model and blocked out colour ID's for my textures.

Retopo :


Colour ID :


Hurdy-Gurdy texturing process :


Fish skeleton texturing process :


Assets imported into UE4 with their textures applied:


I still need to re-adjust colour and properties of my metal material but I'll do that after I texture the gun as it also uses a lot of metal.


Friday, 18 October 2019

Week 3 summary

Illness still holding me back but it's getting better. To make up for me not being able to work at a computer for long hours I've turned to tutorials and lectures for the time being.

Some interesting things I've learnt:

InstantMeshes - An interactive field-aligned mesh generator
Some people enjoy retopology, but I'm not one of them. So I'm on a constant lookout for new ways of making this task easier. I did like this software a lot as we're able to retopologize to desired vertex count, there are different alghorithms to choose from (quads and tri based) and a variety of tools to help with proper loop placement. It did not work as desired with small, low poly props I'm currently making but will definitely use it in the future for speeding up the production process in the future.


Zremesher - I compared my results with Zremesher, however even with polypaint and loop strokes it did not generate desired results. I'll keep trying with other models but this time I had to tweak my low poly meshes by hand in Maya.


In order to test my low poly retopology models I've tested them in Substance Painter. In my 2nd year projects I got really lazy with my UV's so I tried to improve these. They're still not perfect but I'm behind because of the illness at the moment so my focus is going to be on finishing the rest of the assets, their materials, shaders & presentation.
Turns out my model baked really well and I'm satisfied with the results, this gives me a good base for texturing :)


And here is a quick mock up of some default substance materials on my fish skeleton model ( I do not own these materials and did not alter them in any way, it's only for testing purposes only)


I've also made an initial Unreal Engine blockout for the formative submission purpose only. 


Week 2 summary

This week has not been very fruitious, I've fallen very ill and unfortunately couldn't do much work.
Since I've had my blockouts ready I managed to sculpt one of my assets in Zbrush. To challange myself I started from the one that seemed most difficult - the fish skeleton as it involves very different materials - wood, metal and bones that are stylised on top of that. I've referred to the style guide to stay true to the Sea of Thieves look, however I've realised that my texturing will be key to pull of that style so I kept sculpted detail to minimal.


Tuesday, 1 October 2019

Week 1 summary

My focus this week was to complete the research, moodboard, concept, blockout, sculpt and retopology phase for the RARE  - props project.

The first step was to make a low poly blockout base for my models. I've chosen to 3d model a Hurdy Gurdy, a Blunderbuss and a Fish Skeleton. It was difficult to choose 3 assets that'll look good together in my final beauty shots which is why I've made composition thumbnails first:


Then I've moved on to 3ds Max to make my blockouts. In order to keep my scale consistent I've set the units to centimetres, made a few box "cages" to which I can refer to in terms of size, and finally, set up half-transparent planes with concept drawing elevations on them. Onto modelling!


Right off the bat I've noticed that there's some challenge to these concepts and space for my own interpretation as some of it is not accurate. For example, in the concepts, fish skeleton has a greater number of spine bones in the top view as opposed to side view. In industry environment I'd have to communicate with the artist/project leader but since the assets already exist in game, I referred to the finished products when making decisions.