Thursday 23 January 2020

Marmoset experiments - Finishing touches


I've finished this experimental piece by working on the overall presentation. I added make up to my character, adjusted the hair cards, added a turtleneck/scarf but also added some personality with a basic face expression. The main goal was to get better at marmoset and I think I've achieved that with this experiment.

This makes me feel more confident about my FMP and ready to move on to my project :)

Important things I've learnt with this piece:

- Break up hair cards into smaller strands and bake your own xgen hairs
- Bake the iris into eye mesh for a parallax effect
- Make it more convincing by adding a clear glossy mesh over the eye
- Group hair strands into different sections - scalp, long strands & strands blending hair with skin to avoid the visible clipping
- Ask for feedback when working with SSS as it's easy to make skin look like jelly.

Thursday 9 January 2020

Marmoset experiments - Hair cards


More experimentation, gotta figure out how to make nicer hair cards as these look like black spaghetti noodles at the moment. I want to try making some simple hair styles that I can use as a base for more intricate ones in the future. Oh and also, because I have such a large budget for my FMP, I just have to squeeze the most out of these hair cards and make them look glorious. Luckily the character concept I'm going for has short hair.

Process gif below:

Wednesday 8 January 2020

Marmoset experiments - Eyes & facial hair


Another day of playing with Marmosest, learning on how to prepare my FMP assets to make my life easier while trying to achieve a higher degree of realism!

Today I learnt the basics of making an eye with the Peter Zoppi method. It's a very creative use of baking & UV unwrapping. However, I feel like I could certainly improve my result and that I'm not quite there yet. 

Firstly I used marmoset (!!!) to bake (!) my eyeballs. I've baked an eyeball with an iris 'concave to a low poly eyeball containing a small bump for the cornea. 

Then I've textured it, added some black magic effects and made it glossy with a separate mesh sitting over my eye object.


The black bits around the eye are supposed to blend the eyelids with the eye but I'm not sure this method works for me, I'll keep testing. It's basically a piece of the eyelid mesh put over the base mesh with transparency & blur effects.


This felt very uncanny valley so I decided I cannot stop working until I add some lashes and brows. For that I have used fibermesh in Zbrush as it allows for very quick facial hair generation. I would not use this for head-hair as they vary too much and there's too much detail, but for lashes it was very quick and simple. I clumped them, smoothed them out, adjusted with the move tool and they were ready to go.


Lashes required a very simple material set up, one thing that surprised me is how well the metallic setting works on them, it makes them very dark and prominent which is what I wanted as I'll be applying make up to my character later on.


I struggled with the brows because I didn't want ridiculously bushy brows (like on the screenshot below) but wanted a good level of coverage so that they don't look sparse. To fix that I painted over the skin texture and it worked pretty well. I'm not gonna continue working on them until I have my hair in place to make sure they work well together.


Aaaand here's the final look for today! I've also added another layer of mesh over the lips with a normal map and a high gloss factor for that lip-gloss look! Also, finally found out why my skin texture was looking ghoulishly gray and fixed it as well. It was the tint over my albeido map ^^


Tuesday 7 January 2020

Marmoset experiments - Skin


Deadline is over but the show must go on. Today I decided to improve my skin texturing methods and tried adding some fibermesh peach fuzz as well. Not very game-friendly, but satisfying :)

Model is a default head model from zbrush retopod and unwrapped by me ( as evident in these strong seamlines on the forehead)

My goal over the next week is to try out all things I want to include in my FMP. Not necessarily peach fuzz, however I'd like to make fibermesh style groomed hair cards, realistic eyes, lashes, all the good stuff!

Still need to figure out how to render the skin texture in marmoset though, as all the tiny pores and wrinkles are hardly showing up.

Monday 6 January 2020

Summative Submission

1. RARE Props 


2. Helmeted Character


3. Sunset Overdrive Character

Sunset Overdrive Character progress

Beware, this will be a massive update as I've not blogged the process of making this character. Why? Because it was not going too well, I didn't feel like I was making a lot of progress and overall felt bad about it. But let's reflect on it.


Firstly, I need to address why I have changed my mind on which project to complete last minute. I was behind, a mixture of external issues has limited my time available for this project and doing something completely new like a creature that requires its own anatomy, a good solid concept, lots of references and a special rig was not the best choice for me at the moment.

That's when I stumbled upon this concept made by Rodrigo Ribeiro for a project that's been cancelled and fell in love with it. I felt like I could re-create it in 3d and it would suit the Sunset Overdrive theme very well. That's how I ended up going with that brief instead. I'm glad I did as I learnt a lot and feel better prepared for my FMP.


And below you can see my moodboard of inspirations for this character in case I have to take any creative decisions and overall, what Sunset Overdrive character are designed like. I think the concept I chose blends well with the rest!


I've also made some variations based on the official art, but decided to stick to the original art, I can easily change things like colours and patterns with Substance anyways.


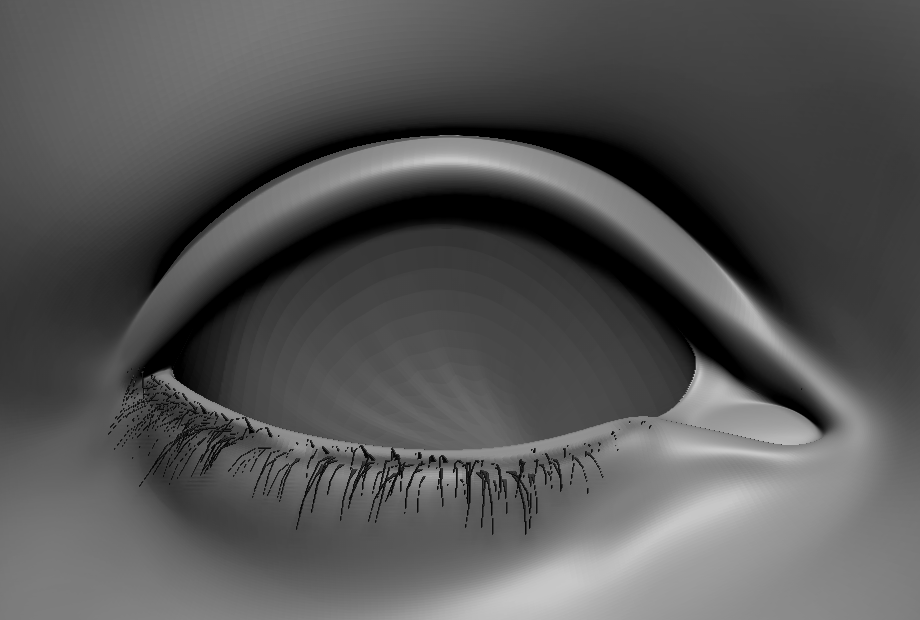
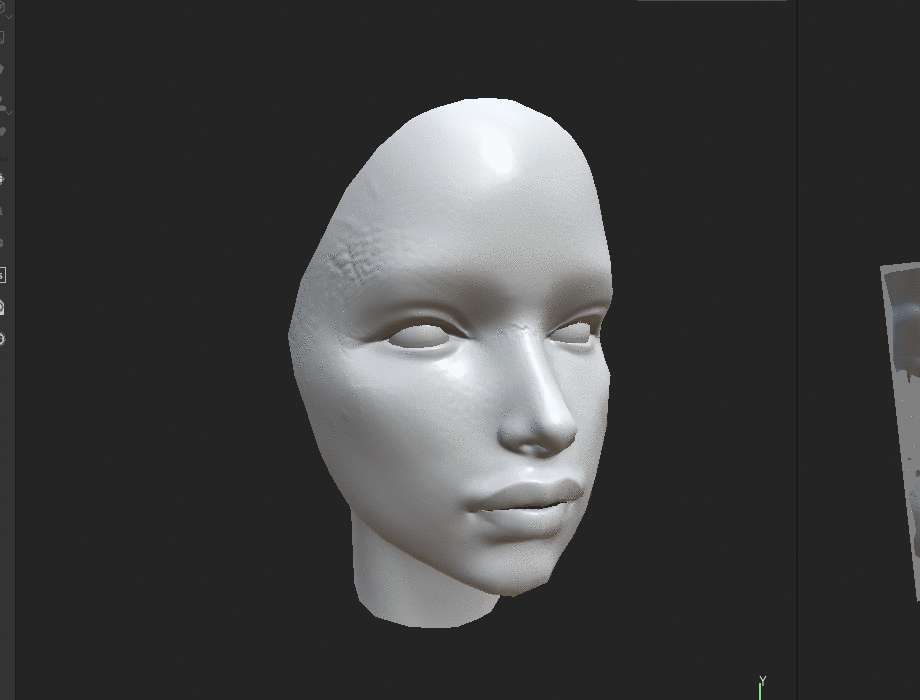
This time I've skipped making a low poly base of each component all together and worked in Zbrush. I did that because All the clothes are pretty tight on the body so I can extrude them easily and any other forms like the mask and the tail are pretty easy to make from primitives provided in Zbrush. I've gotten much more comfortable with the software. I used to just soften my low poly models in Zbrush and add details in it using alpha brushes but now I did the majority of work in it. It was difficult to work on the silhouette in it, however, I'm satisified with what I made.


It might not have been the greatest idea, and definitely not the most efficient, but I wanted to learn more about anatomy so I did a series of studies while making this character. This exercise gave me a better idea of how muscles are shaped and how they poke through the skin on a fit character.


Thought this is too much on a charactered that will be clothed?


Is she done?


No?


Legs.


Back (so complicated)


Quick render of the body base I've made


I've made the clothing by extracting pieces of my body base mesh, zremeshing them and extracting. On the concept the clothing looks rather tight and we can assume that the character is a delinquent so maybe she doesn't fit in her uniform anymore? Doesn't bother with the sizing or just wants to look more desirable but ends up looking funny? Who knows, but I took notes and did my best to translate this information into my sculpt.


Making a skirt took a few tries but I've eventually came up with one that I like. I didn't want it to look too formal or detailed but I needed to include pleats to make it look like a school uniform skirt.


Below you can see my final high poly sculptures for this character.


After completing this it was time to retopo and texture my character.


While I'm using different software and tools such as Zremesher for the retopo process, I think that Maya quad draw tool beats them when it comes to the face. It requires proper polygon loops for animation & texturing and it's hard to get same result with other tools, even when projecting a perfectly retopod mesh or adding the Zremesher guide lines.


In this project I made the mistake of badly organising my objects into UV sheets. The unwrap was also of poor quality. It was inefficient and didn't give me the results I wanted.


Even though I did add effects to mimic fabric, leather, skin, etc, they were so subtle they're almost non existent. My feedback for this project included improving my texture work. I agree as it got to the point that my model's quality has been significantly decreased.

I also struggled with the retopo process as I got so used to cutting corners on the polycount so much in my previous projects that I ended up 10k tri below the budget. It did affect my model and there are visible lines harsh lines, distorted silhouette and even more distorted rig because of the lack of polygons and poly loops.


Here's my summative submission


While I was happy with my improvement of using marmoset, it still wasn't what I have envisioned and I've lost a lot of detail from my high poly sculpt because of poor texturing.

Before the summative submission my goal was to improve the polycount, especially in the important objects like the mask or the clothing. Especially in the areas of deformation that needed more loop support.

I've managed by re-doing my retopo. This also allowed me to improve my UV's, UV packing and therefore baking and texturing. IT was a pleasure to work on this model once I got the technical side down properly.

Below you can see the steps of my texturing. Each element was separated by using ID maps.


I have to admit that the best part about rigging the character was the fact that she doesn't have any fingers. I only used a single bone for the entire hand and it gave me the range of motion I wanted. Nevertheless I needed additional bones for the tail. I'm happy with how it turned out and how I was able to present my work :)


To improve this work further, I would re-do the seams as I can still see some when rendering my character in marmoset. I will keep this in mind for my next projects!


Helmet Character progress

Simply put, my summative submission was underwhelming. I did not manage to even texture blockout my character and the rigging was messed up as well!


Looking back at it, there was a lot that was wrong, the retopology, the unwrap, the UV islands, a lot of clipping issues. Now that I think of it it was a crazy idea to attempt hair cards with so many fundamental things suffering but here we are.


Oh god these flipped normals


Some of the feedback I have received mentioned my character leaning forward too much, because of that my character lacked the "weight" feeling and its anatomy suffered. I received a good tip which is aligning the middle of my characters ear with its feet! Another thing was, my characters feet were pointing inwards, which also has distorter my characters posture. For the rigging, as I expected I need to resolve the skinning issues and keep in mind the balance and how dynamic the pose really should be for presentation purposes (really, anything other than a T-pose will do). In addition, I was advised to alter my retopology by ditching the lace low poly model all together for the sake of baking them on a boot. I did not do that in the first place because I was still figuring out the correct way to bake my objects by mesh name and it was the only way to get the results I wanted which looking back at it was EXTREMELY inefficient. Finally, my favourite tip was to segregate my UV sheets by material type instead of packing on everything without much thought into a single sheet. The texture budget in total for this project was a single 4k map, so I split it into 4 1k maps as advised. These included : cloth, skin, metal & hair. This has really accelerated my texturing process, made it more efficient, made it so much easier and allowed me to focus on the material properties and not covering up baking or modelling mistakes. 


It was my mistake that I did not seek that feedback sooner, while I did ask some people for it, they did not really look critically into my project or maybe tried to be nice? I have to focus on getting more quality feedback in 2020.


Firstly, I had to go way back to my Zbrush model and fix the posture issue. It was very easy taking into consideration my model was organised well, divided into named subtools with polygroups applied, thank you past-me for doing that.


Here's how it looked before, with a guest appearance from Michael Jackson for reference, we're not doing that.


And here's how my model is standing in the finished model & pose.

Altering the 3d sculpt did come at a high cost as I had to re-visit my low poly model as well if I wanted to texture it. Therefore, I've not only re-done the boot retopology, getting rid off the laces, I've also adjusted some other things like the shirt, some helmet parts, corset and the pants. I've gotten rid off that detailed belt retopology for the sake of something simpler and easier to unwrap & texture. 

I was doing this after I've already done my 3rd character so I was way more comfortable with baking & the way to unwrap things to make it work better. I also had more polygons after getting rid off the laces so I could invest them in the key objects like the shirt or helmet!


Below you can see the adjusted mofel and a test bake of my new unwrap!


As I have already said, I've unwrapped my model again and packed it. I learnt how to use packing to my advantage like keeping UV's of the same object facing the same direction, the correct sizing, how to squeeze them snugly together, fighting for every last pixel. This has left me with 4 UV sheets, perfectly ready for baking and texturing. I could probably still learn how to do it better, but it's still progress. 


And yes, hair unwrap is supposed to overlap like that!

As I've already said for my previous project, using bake by mesh name & material ID's makes texturing a breeze, Below you can see my processes. I focused on portraying different types of materials and their physical attributes in a way that will be consistent throughout the model.

Below you can see my texturing processes for this project


Hair cards were something new to me but I figured out an easy way to make them work, solely using substance painter for texturing. They're not realistic hair by any means, but I didn't need a lot of hair. I used hair cards in a way that hopefully draws attention to the helmet and creates a nice flow in the character.

Mandatory shiny hair gif:


I really like what I ended up with, I still need to work on making the most out of my textures when presenting them in marmoset, however it's certainly better than it was when I was just getting started with marmoset months ago. For this project, the presentation was as usual for me, very simple, with a simple gradient plane. I think it's very effective but I might experiment with something different before FMP, I still have some time to make changes to my brief!

Lastly, because of adjustments made to my mesh I was able to get a wider range of motion in my character, so the rigging process was not as much of a headache!


Below you can see a difference in my work, both presented in marmoset, set only 5 months apart


I don't think I need to express how proud I am of myself of getting better at this, I'm coming for you FMP!